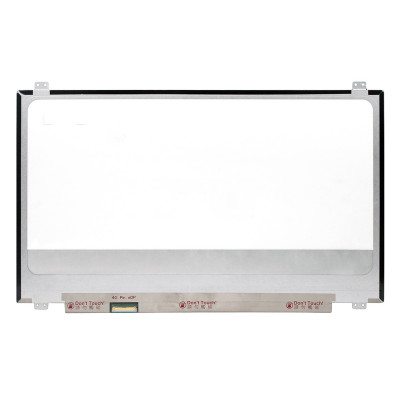
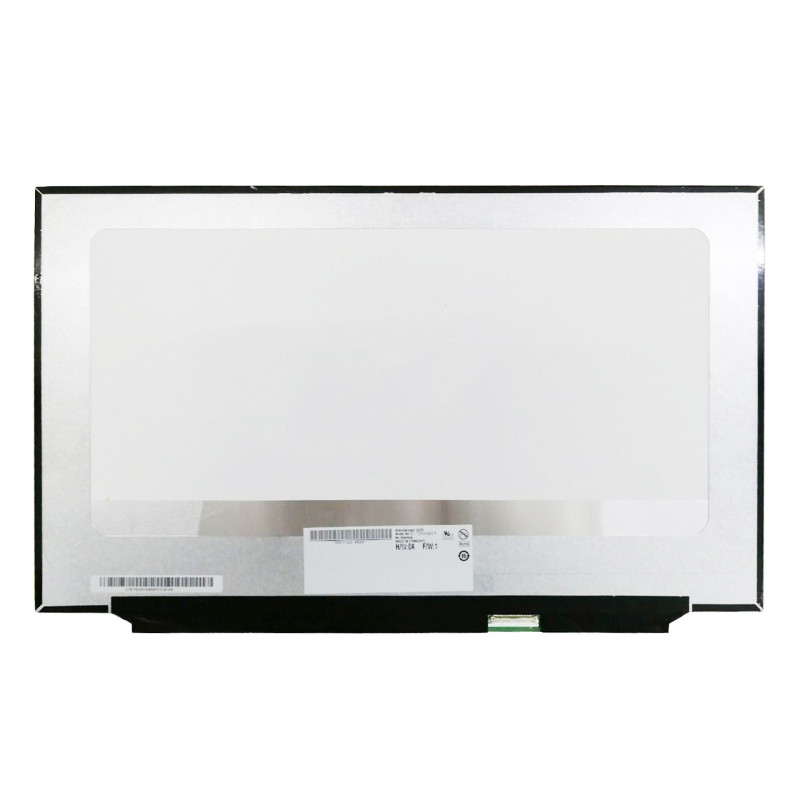
N173HCE-G33 LCD screen panel

Popularity (1716 customers like it)
PCS pcspare.com
ID: PCS-8281 Type: WLED display Size: 17.3 Model/PN: N173HCE-G33 Refresh Rate: 144HZ Resolution: 1920(RGB)×1080, 16:9, FHD Interface: EDP 40 pin Connector width: 25mm Pin pitch: 0.5mm Condition: Grade A+
Availability: In Stock
‌EUR € 72.00
Bulk Quote
  • Guaranteed to fit your Display Panel N173HCE-G33
  • Free step-by-step repair guide File
  • Tracked shipping & easy returns

Complete specifications for reference:
Acer Nitro 5 AN517-41 Series Acer Nitro 5 AN517-42 Series Acer Nitro 5 AN517-51 Series Acer Nitro 5 AN517-52 Series Acer Nitro 5 AN517-53 Series Acer Nitro 5 AN517-54 Series Acer Nitro 5 AN517-55 Series Acer Predator Helios 300 PH317-53 Series Acer Predator Helios 300 PH317-54 Series Acer Predator Helios 300 PH317-55 Series Acer Predator Helios 300 PH317-56 Series Acer Predator Helios 700 PH717-71 Series Acer Predator Helios 700 PH717-72 Series ASUS TUF Gaming A17 FA706 Series ASUS TUF Gaming A17 FA706I ASUS TUF Gaming A17 FA706IC ASUS TUF Gaming A17 FA706IE ASUS TUF Gaming A17 FA706IH ASUS TUF Gaming A17 FA706IHR ASUS TUF Gaming A17 FA706II ASUS TUF Gaming A17 FA706IU ASUS TUF Gaming A17 FA706Q ASUS TUF Gaming A17 FA706QE ASUS TUF Gaming A17 FA706QM ASUS TUF Gaming A17 FA706QR ASUS TUF Gaming A17 FA707 Series ASUS TUF Gaming A17 FA707R ASUS TUF Gaming A17 FA707RC ASUS TUF Gaming A17 FA707RE ASUS TUF Gaming A17 FA707RM ASUS TUF Gaming A17 FA707RR ASUS TUF Gaming A17 FA707RW ASUS TUF Gaming A17 FA707X ASUS TUF Gaming A17 FA707XI ASUS TUF Gaming A17 FA707XU ASUS TUF Gaming FX705 Series ASUS TUF Gaming FX705G ASUS TUF Gaming FX705GE ASUS TUF Gaming FX705GM ASUS TUF Gaming F17 FX706 Series ASUS TUF Gaming F17 FX706H ASUS TUF Gaming F17 FX706HC ASUS TUF Gaming F17 FX706HCB ASUS TUF Gaming F17 FX706HE ASUS TUF Gaming F17 FX706HF ASUS TUF Gaming F17 FX706HM ASUS TUF Gaming F17 FX706I ASUS TUF Gaming F17 FX706II ASUS TUF Gaming F17 FX706IU ASUS TUF Gaming F17 FX706L ASUS TUF Gaming F17 FX706LI ASUS TUF Gaming F17 FX707 Series ASUS TUF Gaming F17 FX707V ASUS TUF Gaming F17 FX707VU ASUS TUF Gaming F17 FX707VV ASUS TUF Gaming F17 FX707Z ASUS TUF Gaming F17 FX707ZC ASUS TUF Gaming F17 FX707ZC4 ASUS TUF Gaming F17 FX707ZE ASUS TUF Gaming F17 FX707ZM ASUS TUF Gaming F17 FX707ZR ASUS TUF Gaming F17 FX707ZU ASUS TUF Gaming F17 FX707ZV ASUS TUF Gaming FX765GM Series ASUS TUF Gaming FX766 Series ASUS TUF Gaming FX766H ASUS TUF Gaming FX766HC ASUS TUF Gaming FX766HCB ASUS TUF Gaming FX766L ASUS TUF Gaming FX766LI ASUS ROG Chimera G703 Series ASUS ROG Chimera G703G ASUS ROG Chimera G703GX ASUS ROG Chimera G703GXR ASUS ROG Strix G712 Series ASUS ROG Strix G712L ASUS ROG Strix G712LU ASUS ROG Strix G712LV ASUS ROG Strix G712LW ASUS ROG Strix G712LWS ASUS ROG Strix G713 Series ASUS ROG Strix G713I ASUS ROG Strix G713IC ASUS ROG Strix G713IE ASUS ROG Strix G713IH ASUS ROG Strix G713IM ASUS ROG Strix G713IR ASUS ROG Strix G713P ASUS ROG Strix G713PI ASUS ROG Strix G713PU ASUS ROG Strix G713PV ASUS ROG Strix G713Q ASUS ROG Strix G713QC ASUS ROG Strix G713QE ASUS ROG Strix G713QM ASUS ROG Strix G713QR ASUS ROG Strix G713R ASUS ROG Strix G713RC ASUS ROG Strix G715 Series ASUS ROG Strix G715G ASUS ROG Strix G715GV ASUS ROG Strix G715GW ASUS ROG Strix G G731 Series ASUS ROG Strix G G731G ASUS ROG Strix G G731GU ASUS ROG Strix G G731GV ASUS ROG Strix G G731GW ASUS ROG Scar 17 G732 Series ASUS ROG Scar 17 G732L ASUS ROG Scar 17 G732LV ASUS ROG Scar 17 G732LW ASUS ROG SCAR II GL704 Series ASUS ROG SCAR II GL704G ASUS ROG SCAR II GL704GM ASUS ROG SCAR II GL704GV ASUS ROG SCAR II GL704GW ASUS ROG G GL731 Series ASUS ROG G GL731G ASUS ROG G GL731GU ASUS ROG G GL731GV ASUS ROG G GL731GW ASUS ROG Zephyrus S GX701 Series ASUS ROG Zephyrus S GX701G ASUS ROG Zephyrus S GX701GV ASUS ROG Zephyrus S GX701GVR ASUS ROG Zephyrus S GX701GVR-EV ASUS ROG Zephyrus S GX701GW ASUS ROG Zephyrus S GX701GW-DB76 ASUS ROG Zephyrus S GX701GW-EV ASUS ROG Zephyrus S GX701GW-PS74 ASUS ROG Zephyrus S GX701GWR ASUS ROG Zephyrus S GX701GWR-EV ASUS ROG Zephyrus S GX701GWR-H ASUS ROG Zephyrus S GX701GWR-HG ASUS ROG Zephyrus S GX701GX ASUS ROG Zephyrus S GX701GXR ASUS ROG Zephyrus S GX701GXR-EV ASUS ROG Zephyrus S GX701GXR-H ASUS ROG Zephyrus S GX701GXR-HG ASUS ROG Zephyrus S GX701L ASUS ROG Zephyrus S GX701LV ASUS ROG Zephyrus S GX701LW ASUS ROG Zephyrus S GX701LWS ASUS ROG Zephyrus S GX701LX ASUS ROG Zephyrus S GX701LXS ASUS ROG Zephyrus S GX735 Series ASUS ROG Zephyrus S GX735G ASUS ROG Zephyrus S GX735GV ASUS ROG Zephyrus S GX735GVR ASUS ROG Zephyrus S GX735GW ASUS ROG Zephyrus S GX735GWR ASUS ROG Zephyrus S GX735GX ASUS ROG Zephyrus S GX735GXR ASUS ROG Zephyrus S GX735L ASUS ROG Zephyrus S GX735LW ASUS ROG Zephyrus S GX735LWS ASUS ROG Zephyrus S GX735LX ASUS ROG Zephyrus S GX735LXS ASUS ROG Mothership GZ700 Series ASUS ROG Mothership GZ700G ASUS ROG Mothership GZ700GX ASUS ROG GZ755 Series ASUS ROG GZ755G ASUS ROG GZ755GX ASUS ROG GZ755GXR ASUS ROG GZ775 Series ASUS ROG GZ775G ASUS ROG GZ775GX ASUS PX705 Series ASUS PX705G ASUS PX705GM ASUS PX707 Series ASUS PX707Z ASUS PX707ZM ASUS PX712 Series ASUS PX712L ASUS PX712LU ASUS PX713 Series ASUS PX713Q ASUS PX713QE ASUS PX713QM ASUS PX731 Series ASUS PX731G ASUS PX731GU ASUS PX731GV ASUS PX731GW ASUS TUF705 Series ASUS 705G ASUS 705GE ASUS 705GM ASUS 706 Series ASUS 706H ASUS 706HC ASUS 706HCB ASUS 706HCNT ASUS 706HE ASUS 706HM ASUS 706I ASUS 706IC ASUS 706ICB ASUS 706IE ASUS 706IH ASUS 706IHNT ASUS 706IHR ASUS 706II ASUS 706IU ASUS 706L ASUS 706LI ASUS 706Q ASUS 706QE ASUS 707 Series ASUS 707R ASUS 707RC ASUS 707RE ASUS 707RR ASUS 707Z ASUS 707ZC ASUS 707ZM ASUS 707ZV4 ASUS 756 Series ASUS 756G ASUS 756GM ASUS 765 Series ASUS 765G ASUS 765GE ASUS 765GM ASUS 766 Series ASUS 766H ASUS 766HC ASUS 766HCB ASUS 766HE ASUS 766HEB ASUS 766HM ASUS 766I ASUS 766IH ASUS 766II ASUS 766IU ASUS 766L ASUS 766LI ASUS 766Q ASUS 766QM ASUS 766QR Gigabyte AORUS 17G KD Series Gigabyte AORUS 17G KD-72ES325SH Gigabyte AORUS 17G KD-72ES325SD Gigabyte AORUS 17G YD Gigabyte AORUS 17G YD-73ES345SH Gigabyte AORUS 17 YE5 Gigabyte AORUS 17 YE5-74ES544SH Gigabyte AORUS 17X YD Gigabyte AORUS 17X YD-94ES367SP Gigabyte AORUS 17G XD Gigabyte AORUS 17G XD-73ES345SH HP Omen 17-CB Series HP Omen 17-CBxxx Series HP Omen 17-CB000 Series HP Omen 17-CB0001ns HP Omen 17-CB0003ns HP Omen 17-CB0004ns HP Omen 17-CB0005ns HP Omen 17-CB0006ns HP Omen 17-CB0007ns HP Omen 17-CB0008ns HP Omen 17-CB0009ns HP Omen 17-CB0010ns HP Omen 17-CB0011ns HP Omen 17-CB0012ns HP Omen 17-CB0013ns HP Omen 17-CB0014ns HP Omen 17-CB0015ns HP Omen 17-CB0016ns HP Omen 17-CB0017ns HP Omen 17-CB0018ns HP Omen 17-CB0019ns HP Omen 17-CB0020ns HP Omen 17-CB0021ns HP Omen 17-CB0022ns HP Omen 17-CB0023ns HP Omen 17-CB0024ns HP Omen 17-CB0026ns Lenovo Legion 5-17ACH6 Series Lenovo Legion 5-17ACH6 ( 82K0 ) Series Lenovo Legion 5-17ACH6H Series Lenovo Legion 5-17ACH6H ( 82JY ) Series Lenovo Legion 5-17ARH05H Series Lenovo Legion 5-17ARH05H ( 82GN ) Series Lenovo Legion 5-17IMH05 Series Lenovo Legion 5-17IMH05 ( 82B3 ) Series Lenovo Legion 5-17IMH05H Series Lenovo Legion 5-17IMH05H ( 81Y8 ) Series Lenovo Legion 5-17ITH6 Series Lenovo Legion 5-17ITH6 ( 82JN ) Series Lenovo Legion 5-17ITH6H Series Lenovo Legion 5-17ITH6H ( 82JM ) Series Lenovo Legion Y540-17IRH Series Lenovo Legion Y540-17IRH ( 80Q4 ) Series Lenovo Legion Y540-17IRH ( 81Q400ERSP ) Lenovo Legion Y540-17IRH ( 81Q4005ESP ) Lenovo Legion Y540-17IRH ( 81Q4005FSP ) Lenovo Legion Y540-17IRH ( 81Q4005GSP ) Lenovo Legion Y540-17IRH ( 81T3 ) Series Lenovo Legion Y540-17IRH ( 81T30032SP ) Lenovo Legion Y540-17IRH ( 81T30033SP ) Lenovo Legion Y540-17IRH ( 81T30037SP ) Lenovo Legion Y540-17IRH ( 81T30038SP ) MSI Alpha 17 B5EE Series MSI Alpha 17 B5EEK Series MSI Bravo 17 A4DDK Series MSI Bravo 17 A4DDK-002XES MSI Bravo 17 A4DDR Series MSI Bravo 17 A4DDR-009 MSI MS-17FK MSI Creator 17 A10SE Series MSI Creator 17 A10SF Series MSI Creator 17 A10SFS Series MSI Creator 17 A10SGS Series MSI Creator 17M A9SD Series MSI Creator 17M A9SE Series MSI GE75 Series MSI GE75-8RE Raider Series MSI GE75-8RF Raider Series MSI GE75-8SE Raider Series MSI GE75-8SF Raider Series MSI GE75-8SG Raider Series MSI GE75-9SE Raider Series MSI GE75-9SF Raider Series MSI GE75-9SG Raider Series MSI GE75-9SX Raider Series MSI GF75 Series MSI MS-17F1 MSI MS-17F2 MSI MS-17F3 MSI MS-17F4 MSI GF76 Series MSI Katana GF76 11UC-080ES MSI Katana GF76 11UD Series MSI Katana GF76 11UD-079XES MSI Katana GF76 11UD-628XES MSI GF76 11UE Series MSI GF76 11UE-056XES MSI GF76 11UE-057XES MSI GF76 11UG Series MSI GF76 12UC Series MSI GF76 12UC-037ES MSI GF76 12UD Series MSI GF76 12UD-035ES MSI GF76 12UD-036XES MSI GF76 12UE Series MSI GF76 12UE-058XES MSI GL75 Series MSI 9SDK-Series MSI 9SDK-268XES MSI 9SEK Series MSI 9SEK-074XES MSI 10SDK Series MSI 10SDK-041XES MSI 10SEK Series MSI 10SEK-039ES MSI 10SEK-261XES MSI 10SEK-276ES MSI 10SFK Series MSI 10SFK-060XES MSI GL76 Series MSI 11UEK Series MSI Pulse GL76 11UEK-038XES MSI 11UEK-053ES MSI 11UEK-055XES MSI GP75 Series MSI 9SD Series MSI GP75-9SD Series MSI 9SE Series MSI GP75-9SE Series MSI 9SF Series MSI GP75-9SF Series MSI GT75 8SG Titan Series MSI GT75-8SG Titan Series MSI GT75 10SF Titan Series MSI GT75-10SF Titan Series MSI Prestige P75 Series MSI P75 9SD Creator Series MSI P75-9SD Creator Series MSI P75 9SE Creator Series MSI P75-9SE Creator Series MSI P75 9SF Creator Series MSI P75-9SD Creator Series Asus FA707NU Asus FA707NV Asus FX707VI

LCD Panel — Layer Structure

Top Polarizer TFT Glass Liquid Crystal CF Glass Bottom Polarizer Light Guide Plate LED FPC Driver ③ Glass ② Liquid ① Backlight ④ Polarizer How It Works Backlight → liquid crystal twists light → image forms on screen. Interface: eDP (modern) / LVDS (older) — must match. Check connector width and pin pitch — mismatched cables won't fit.

Frequently Asked Questions & Solutions

What are the resolution and refresh rate of this screen?

Resolution: 1920(RGB)×1080, 16:9, FHD | Refresh Rate: 144HZ.

Important considerations:
  • Your laptop's graphics chip (GPU) must support this resolution and refresh rate. For example, 4K (3840x2160) requires a GPU with DisplayPort 1.2 or higher, and the LCD cable must have sufficient bandwidth (typically 40‑pin eDP).
  • If your original screen was 1366x768 and you install a 1920x1080 panel, the system may work but the BIOS/EDID must recognise the new resolution – some older laptops are locked to the original resolution.
  • High refresh rates (e.g., 144Hz) require a compatible cable and graphics output – ensure your laptop supports it.

If you are upgrading to a higher resolution, we recommend checking your laptop's service manual or online forums for confirmed compatibility.

What interface does this screen use, and what are the connector details?

Interface: EDP 40 pin, Width: 1.0 inch (25mm), Pitch: 0.5mm
Connector width: 25mm – this is the physical width of the connector. Ensure your motherboard's socket has the same width – a mismatched width means the cable will not fit.
Pin pitch: 0.5mm – this is the distance between pins. Common pitches are 0.4mm and 0.5mm. They are not interchangeable – a 0.5mm cable will not fit a 0.4mm socket.

Common interface types for reference:
  • eDP 30 pin, Narrow: Width 0.67 inch (17mm), Pitch 0.4mm – common in ultra‑thin laptops.
  • eDP 30 pin, Standard: Width 0.75 inch (19mm), Pitch 0.5mm – common in standard 14″–15.6″ models.
  • eDP 40 pin, Narrow: Width 0.79 inch (20mm) or 0.83 inch (21mm), Pitch 0.4mm – used for 4K and high‑refresh panels.
  • eDP 40 pin, Standard: Width 1.0 inch (25mm), Pitch 0.5mm – used in larger gaming laptops.
  • LVDS 40 pin: Width 1.0 inch (25mm), Pitch 0.5mm – older interface, limited bandwidth.

How to verify: Check the connector on your original screen – look for printed labels (e.g., "30P 0.4mm") or measure with a ruler. Compare with our product photos.

If you are unsure, send us a clear photo of your original screen's connector – we can match it for you.

What is the physical size of this screen?

Screen size: 17.3 (measured diagonally).

Important: Even a 0.1‑inch difference can make the panel not fit in your bezel or the mounting holes may not align. Always measure your current screen's active area (visible portion) and outer dimensions (including the mounting tabs).

Additionally, check the aspect ratio – most modern laptops use 16:9, but some use 16:10 (which is slightly taller). A 16:10 screen in a 16:9 bezel will not fit physically, and vice versa.

How to measure: Remove the screen from the laptop and measure the diagonal of the active area (from corner to corner). Also measure the width and height of the entire panel (including the metal frame). Compare these numbers with our product specifications.

Is this a touchscreen?

Touch support: No. This is a standard (non‑touch) panel.

It will work in any laptop that accepts a non‑touch screen. If your laptop originally had a touchscreen, installing this non‑touch panel will result in lost touch functionality (but the display will still work). You may also need to use a non‑touch LCD cable.

What is the grade/condition of this screen?

Grade: Grade A+.

Understanding LCD grades:
  • Grade A+ (New): Brand new, flawless panel, zero dead pixels, uniform brightness – the highest quality.
  • Grade A (New compatible): New, but may have minor cosmetic variations (e.g., slightly different backlight uniformity) – rarely noticeable.
  • Grade B (Used/Refurbished): May have a few (<5) dead pixels or minor scratches that do not affect performance – suitable for budget repairs.

We ship all screens in the grade stated on the product page. All screens are tested for functionality – no lines, no flickering, and backlight is working.

If you require a specific grade, please check the product description or contact us before ordering.

Does this screen have any dead pixels or defects?

All our LCD screens are strictly tested before shipping. They are guaranteed to be free of dead pixels, bright dots, and lines at the time of shipment.

What to do if you find defects after installation:
  • Check if the issue is caused by a loose cable – reseat the LCD cable on both ends.
  • Test the screen on another compatible laptop (if possible) to isolate the issue.
  • If the defects are clearly on the panel (e.g., a cluster of dead pixels or a visible scratch), contact our support within 7 days with photos – we will arrange a replacement or refund.

Our warranty covers manufacturing defects only – physical damage during installation is not covered.

Where is the screen physically located, and how is it attached?

The LCD screen is located inside the display lid (A Cover + B Cover) of the laptop. It is attached as follows:
  • To the A Cover (top lid): The screen is usually screwed onto the A Cover using 4‑8 small screws around the edges. Some models use adhesive tape or a metal frame instead of screws.
  • Behind the B Cover (bezel): The bezel covers the front of the screen – it must be removed first to access the screen.
  • The LCD cable connects from the back of the screen (or bottom edge) to the motherboard, passing through the hinge.
  • The screen also has a backlight cable (sometimes integrated with the main cable) that supplies power to the LED backlight.

Accessing the screen requires removing the bezel – some models also require removing the entire display assembly (lid) from the base to avoid damaging cables.

How do I connect the LCD cable to the screen and motherboard?

The connection involves two ends:
  • Screen end: The cable plugs into a connector on the back of the LCD panel (or at the bottom edge). This is typically a ZIF (Zero Insertion Force) connector. To connect:
    • Flip up the small locking tab on the screen connector.
    • Insert the cable with the gold contacts facing up (toward the tab) – the cable is often marked with a blue or red stripe to indicate pin 1.
    • Press the tab down firmly to lock.
  • Motherboard end: The cable plugs into a header on the system board, usually labelled LCD, LVDS, eDP, or J_LCD. The procedure is the same – lift the ZIF tab, insert the cable correctly, and lock.

Critical: The cable must be inserted all the way – if it is not fully seated, you will get a partial display or no image. Do not force the cable; if it does not go in easily, check the orientation.

Always disconnect the battery before connecting or disconnecting the LCD cable to avoid short circuits.

How to replace the LCD screen step by step?

Note: This is a delicate operation – proceed with caution. If you are not confident, consider using a professional repair service.

  1. Preparation: Power off the laptop, disconnect the AC adapter, and remove the battery (if removable). Work on a clean, soft surface.
  2. Remove the bezel (B Cover):
    • Use a plastic spudger or guitar pick to gently pry the bezel off – start from the inner edge (near the screen) and work your way around.
    • Some bezels are secured with adhesive – apply low heat (hair dryer) to soften the glue.
    • Be careful not to bend or crack the bezel – it is often thin and fragile.
  3. Disconnect the old screen:
    • Locate the LCD cable connector on the back of the screen (or at the bottom). Release the ZIF tab and gently pull the cable out.
    • If there is a separate backlight cable, disconnect it as well.
    • Remove the mounting screws (usually 4‑6) securing the screen to the A Cover.
    • Lift the screen out carefully – avoid flexing it.
  4. Install the new screen:
    • Place the new screen in the same position – align the screw holes.
    • Insert and tighten the mounting screws evenly – do not overtighten.
    • Connect the LCD cable – insert it fully into the ZIF connector and lock the tab. Ensure the cable is not twisted or pinched.
    • If your screen has a separate backlight cable, connect it as well.
  5. Reattach the bezel:
    • Press the bezel back into place – start from one corner and work around, ensuring all clips snap.
    • If adhesive was used, apply new adhesive tape or use the original adhesive (if still sticky).
  6. Test before full reassembly:
    • Reconnect the battery and power on the laptop – check for proper display (no lines, flickering, or dead pixels).
    • Test the brightness adjustment and if touchscreen, test touch functionality.
  7. If everything works, power off, disconnect the battery, and reassemble any remaining covers.

Common pitfalls to avoid:

  • Forgetting to connect the cable before mounting the screen – you will need to redo the steps.
  • Pinching the LCD cable in the hinge area – route it carefully exactly as the original.
  • Using screws that are too long – they can damage the screen or the A Cover.
  • Not removing all old adhesive – this can cause the bezel to sit unevenly.

Watch our installation video or consult your laptop's service manual for model‑specific details.

What precautions should I take, and what if the screen does not work after installation?

Critical precautions:

  • Always disconnect the battery before handling any screen or cable – the LCD backlight can carry high voltage (up to 40V) and can damage the inverter or GPU.
  • Handle the screen by the edges – avoid touching the glass surface or the gold contacts on the cable.
  • Never bend or flex the screen – the glass can crack easily.
  • Use ESD protection – wear an anti‑static wrist strap or touch a grounded metal object before touching components.
  • Do not over‑tighten screws – screen frames are delicate; snug is enough.
  • Keep the screen clean – any dust or fingerprints on the inner surface will be visible when the backlight is on.

Troubleshooting – what if the screen does not work after installation?

  • No display (black screen):
    • Check that the LCD cable is fully inserted and locked on both the screen and motherboard ends.
    • Verify the laptop is powered on (listen for fan or look for caps lock light).
    • Test with an external monitor to confirm the laptop is outputting video – if external works, the issue is with the screen or cable.
    • Inspect the cable for damage – a pinched cable can break internal traces.
  • Backlight is on but no image (blank white/grey screen):
    • This usually indicates the video data lines are not connected – reseat the cable, check for bent pins on the connector.
    • Verify that the screen is compatible with your laptop's interface (e.g., eDP vs LVDS).
  • Flickering or intermittent display:
    • Check cable routing – it may be pinched in the hinge area.
    • Ensure the cable is not pulled taut – there should be a slight slack.
  • Lines, artifacts, or distorted colours:
    • Reseat the cable – sometimes a poor connection causes signal noise.
    • If lines persist, the screen may be defective – contact support.
  • Touch not working (for touch screens):
    • Confirm the digitizer cable (if separate) is connected.
    • Install the correct touch driver – some laptops need a specific driver for the new panel.
    • Check BIOS settings – some laptops have a touch enable/disable option.
  • Brightness adjustment not working:
    • Ensure the backlight cable (if separate) is connected.
    • Check if the laptop’s brightness keys are functioning – if not, try reinstalling the graphics driver.
  • Screen is too dark or uneven backlight:
    • This could be a backlight issue – ensure the connector is fully seated.
    • If the screen is a different model, the brightness levels may be interpreted differently – adjust in the OS.

If you have tried all the above and the problem persists: Contact our support with photos of the screen issue and your laptop model – we will help diagnose and arrange a replacement if necessary.
New arrive

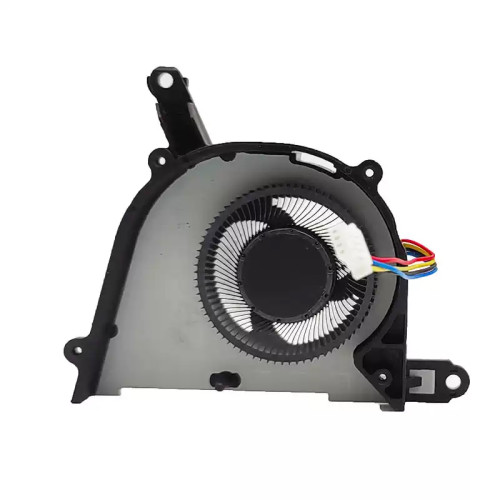
MSI Claw A8 BZ2EM Fan original right
PCS
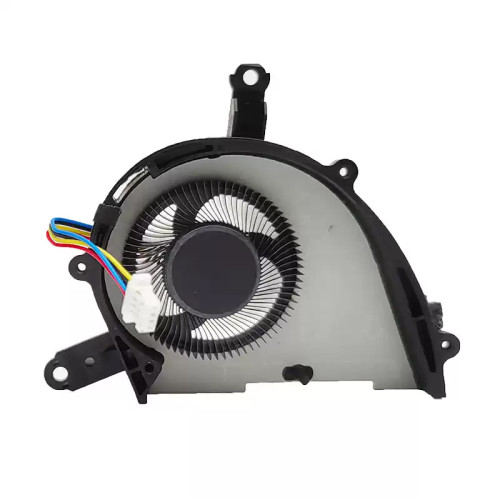
MSI Claw A8 BZ2EM Fan original left
PCS
B6506ASHNF2200TN Fan original
PCS
BN95065S5H-006P Fan original
PCS
‌EUR € 15.30