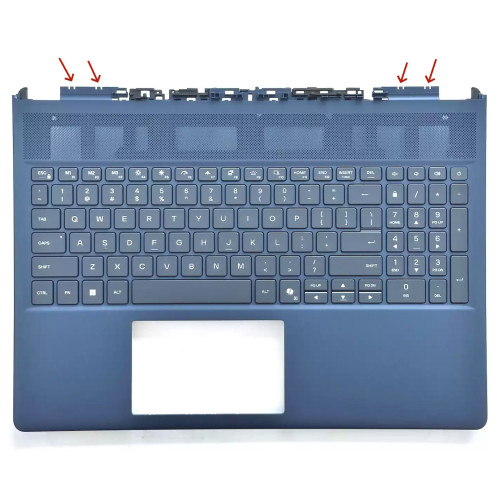
Frequently Asked Questions & Solutions
Which side does this hinge belong to – left or right?
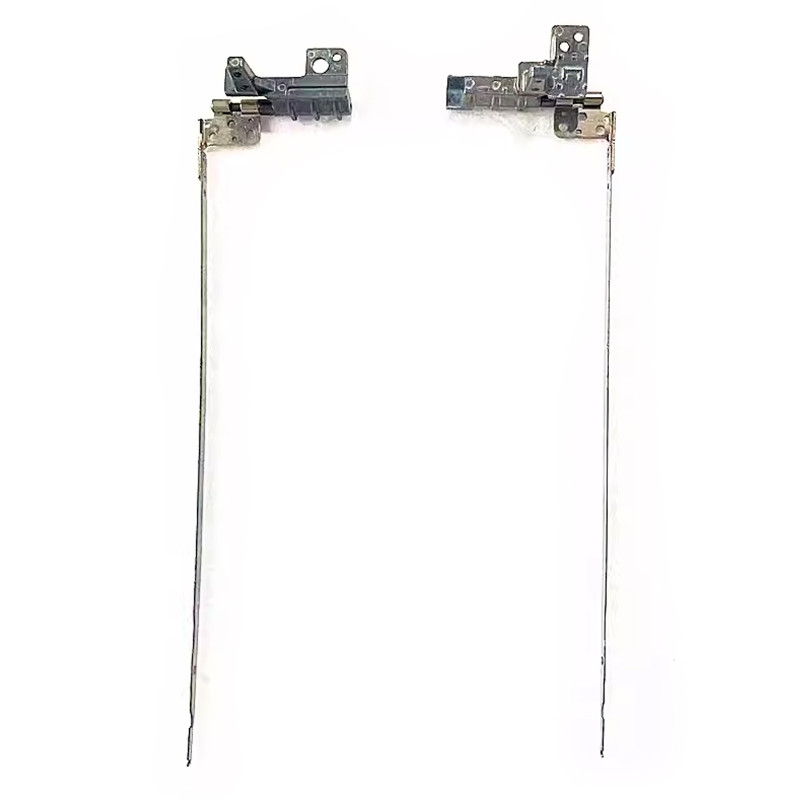
This hinge is for the
left and right side.
Important: Left and right hinges are
not interchangeable – they have different bracket shapes, screw hole positions, and cable routing paths.
How to confirm:
- Open your laptop and look at the hinge area near the display corners.
- The left hinge (when facing the screen) usually has a different shape than the right one.
- Check the part number printed on your original hinge – it often includes "L" (left) or "R" (right).
- If your laptop has both hinges sold as a set, you will receive a pair.
If you are unsure, send us a photo of your original hinge – we can help identify which side you need.
Is this hinge for a touchscreen or a standard (non‑touch) screen?
This hinge is designed for a
standard (non‑touch) screen.
Why touchscreen and non‑touch hinges are different:
- Touchscreen laptops typically have a heavier display panel (due to the digitizer glass layer), so the hinge needs higher torque/tension to hold the screen in position.
- Non‑touch panels are lighter and use lower‑tension hinges.
- Using a non‑touch hinge on a touchscreen will result in the screen not staying open – it will flop down. Using a touchscreen hinge on a non‑touch screen will make the lid too stiff to open smoothly.
How to check your original: Look at the hinge stiffness – if your original screen stays firmly in any position, it is likely a touch‑grade hinge. If you are unsure, check your laptop's original specifications online or contact us with your full model number.
How do I confirm this hinge will fit my laptop?
This hinge is designed for
6460B. To ensure compatibility, please verify the following:
- Mounting hole positions: Compare the screw hole locations on your original hinge with the photos – the spacing must match exactly.
- Bracket shape: The hinge has two brackets – one attaches to the LCD panel (or A Cover) and the other to the base (C Cover). Both shapes must match your chassis.
- Screw size and thread type: Most laptop hinges use M2.0 or M2.5 screws – mismatched screws can strip the threads.
- Cable routing hole: The hinge should have an opening or groove for the LCD cable to pass through – verify this matches your original.
- Torque/tension rating: This hinge has a torque of N/A. If your original hinge had a different rating, the lid's opening feel may change.
Best practice: If you can read the part number on your original hinge (e.g., "DA0HINGE001", "L15651‑001"), compare it with the one listed in our product description. If uncertain, send us clear photos of your original hinge from multiple angles – we will verify compatibility for you.
Where is the hinge physically located, and how is it attached?
The hinge connects the
display assembly (lid) to the
main chassis (base) of the laptop. Its exact location and attachment points:
- At the display end (LCD bracket): The hinge bracket is screwed onto the A Cover (top lid) or directly onto the LCD panel frame. This is usually hidden behind the screen.
- At the base end (chassis bracket): The hinge bracket is screwed onto the C Cover (palmrest) or a metal frame inside the base.
- Through the hinge area: The LCD cable typically passes through an opening in the hinge to transition from the lid to the base – this is the most vulnerable part of the cable.
- Hinges are secured with 2‑4 small screws on each side (both on the display and base ends).
Access required:
- To access the display end – remove the B Cover (bezel).
- To access the base end – you may need to remove the D Cover (bottom) and sometimes the keyboard or C Cover.
Some models have a 360° hinge (for 2‑in‑1 convertibles) – these are a different design and are not compatible with standard 180° hinges.
What is hinge torque/tension, and will the lid feel the same as the original?
Hinge torque (also called tension or friction) is the resistance you feel when opening or closing the laptop lid. It is measured in
kgf·cm or
N·cm.
This hinge has a torque rating of
N/A.
Understanding torque ratings:
- Standard non‑touch screens: Typically use 2.0 – 3.0 kgf·cm per hinge.
- Touchscreen models: Use 3.5 – 5.0 kgf·cm per hinge (heavier panel needs more resistance).
- 2‑in‑1 / 360° convertible models: Use special constant‑torque hinges with different characteristics.
What to expect:
- If the torque matches your original, the lid will feel the same as before.
- If the torque is slightly higher, the lid will feel stiffer – this is normal and will loosen slightly over time with use.
- If the torque is lower, the lid may not stay in position – it will fall forward or backward. This is a sign of wrong hinge type (e.g., using a non‑touch hinge on a touchscreen).
In most cases, a slight deviation (±10%) is acceptable and will not affect usability.
How to replace the hinge step by step?
Note: The following is a general guide. For model‑specific instructions, refer to your laptop's service manual.
Step 1: Preparation
- Power off the laptop, disconnect the AC adapter, and remove the battery (if removable).
- Work on a clean, flat surface.
- Take photos of all screw positions and cable routing before disassembly.
Step 2: Remove the display bezel (B Cover)
- Gently pry off the bezel using a plastic spudger – start from the inner edge.
- Be careful not to damage the LCD panel or the bezel clips.
- Some bezels are held with adhesive – use a heat gun or hairdryer on low heat to soften the adhesive.
Step 3: Access and remove the old hinge (display end)
- Unscrew the hinge brackets from the LCD panel or A Cover – there are usually 2‑3 screws per hinge.
- If the LCD cable passes through the hinge, carefully unroute it from the hinge opening before removing the hinge.
- Remove the old hinge from the lid.
Step 4: Access and remove the old hinge (base end)
- Open the laptop base – you may need to remove the D Cover and/or the C Cover to access the base‑end screws.
- Unscrew the hinge brackets from the C Cover or chassis frame.
- Carefully lift the hinge out – note that it may still be attached to the LCD cable.
Step 5: Install the new hinge
- Route the LCD cable through the new hinge's opening before securing the hinge – this is critical. Do not forget this step, or you will need to redo the installation.
- Secure the hinge to the base end first (C Cover/chassis frame) with screws – tighten evenly but do not over‑torque.
- Secure the hinge to the display end (LCD panel or A Cover) – align the holes carefully.
- Gently test the opening and closing motion to ensure smooth operation.
Step 6: Reassembly and testing
- Reconnect all cables, ensuring the LCD cable is not pinched in the hinge area.
- Reattach the bezel (B Cover) – press around the edges to snap clips back into place.
- Reassemble the base (D Cover and any removed components).
- Power on the laptop, check the display, and test the hinge opening/closing at multiple angles.
Warning: When routing the LCD cable through the hinge, ensure it has enough slack to allow full movement without tension. A pinched cable will cause display flickering or failure.
What precautions should I take, and what if the hinge is too stiff, too loose, or makes noise?
Critical precautions:
- Always disconnect the battery before working on hinges – the LCD cable runs through the hinge and carries voltage.
- Do not over‑tighten screws – hinge threads are easy to strip. Tighten just until snug, then a quarter‑turn extra.
- Keep the LCD cable safe – the hinge area is the most common failure point for cables. Route it carefully and avoid pinching.
- Support the screen when opening or closing during installation – do not let it fall freely.
- Use the correct screws – some hinge screws are shorter than others. Reusing original screws is recommended.
- Check for grounding – some hinges have grounding springs – ensure they make contact with the chassis.
Troubleshooting after installation:
- Hinge is too stiff (hard to open): The torque may be higher than original. This can be normal for new hinges – they often loosen slightly after 20‑30 open/close cycles. If it is extremely stiff, check if screws are over‑tightened or if the hinge is misaligned.
- Hinge is too loose (lid falls): The torque may be too low – possibly a wrong hinge type (non‑touch on touchscreen). Check if the hinge is fully tightened and no screws are missing.
- Lid does not close completely: The hinge may be misaligned or screws are not fully seated. Loosen, realign, and retighten.
- Display flickers when opening/closing: The LCD cable is pinched in the hinge – re‑route the cable immediately to avoid permanent damage.
- Grinding or clicking noise: There may be debris inside the hinge – try a drop of lubricant (e.g., PTFE spray). If the noise persists, the hinge may be defective.
- Uneven gap between lid and base: One side hinge may be mounted higher than the other – realign and retighten evenly.
- Screen wobbles at certain angles: The hinge may have internal wear – if adjusting screws does not fix it, the hinge is likely defective.
If you suspect the hinge is defective or the wrong fit: Contact our support with photos and your laptop model – we will help verify and arrange a replacement if needed.