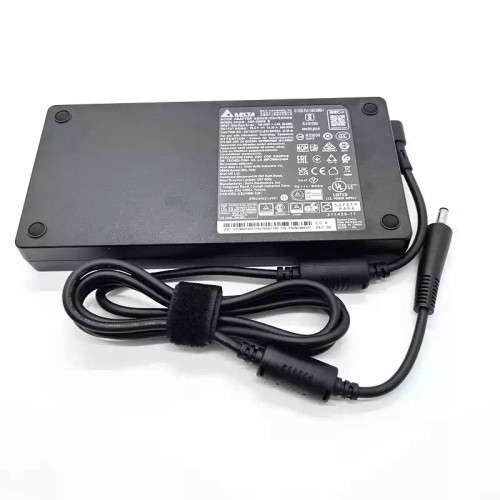

Complete specifications for reference:
Acer Aspire A715-42 Series
Acer Aspire A715-42G Series
Acer Aspire A715-43 Series
Acer Aspire A715-43G Series
Acer Aspire A715-76 Series
Acer Aspire A715-76G Series
Acer Nitro 5 AN515-45 Series
Acer Nitro 5 AN515-55 Series
Acer Nitro 5 AN515-58 Series
Acer Predator Helios 300 PH315-52 Series
Acer Predator Helios 300 PH315-52 (Model N18I2)
Acer Predator Helios 300 PH315-53 Series
Acer Predator Helios 300 PH315-54 Series
Acer Predator Triton 300 PT315-52 Series
Acer Predator Triton 500 PT515-52 Series
Asus TUF Gaming A15 FA506Q Series
Asus TUF Gaming A15 FA506QM Series
Asus TUF Gaming A15 FA506QR Series
Asus TUF Gaming A15 FA566II Series
Asus TUF Gaming A15 FA566IU Series
Asus TUF Gaming A15 FX505 Series
Asus TUF Gaming A15 FX505D Series
Asus TUF Gaming A15 FX505GE Series
Asus TUF Gaming A15 FX505GM Series
Asus TUF Gaming A15 F15 FX506HC Series
Asus TUF Gaming A15 FX506HE Series
Asus TUF Gaming A15 FX506LH Series
Asus TUF Gaming A15 FX506LI Series
Asus TUF Gaming A15 FX506LU Series
Asus TUF Gaming A15 FX506QM Series
Asus TUF Dash F15 FX516 Series
Asus TUF Dash F15 FX516PM
Asus TUF Dash F15 FX516PM-HN023
Asus TUF Dash F15 FX516PM-HN023T
Asus TUF Dash F15 FX516PM-HN024
Asus TUF Dash F15 FX516PM-HN026
Asus TUF Dash F15 FX516PM-HN135
Asus TUF Dash F15 FX516PR
Asus TUF Dash F15 FX516PR-HN002
Asus TUF Dash F15 FX516PR-AZ019T
Asus TUF Gaming F15 FX566 Series
Asus TUF Gaming FX566H
Asus TUF Gaming FX566HC
Asus TUF Gaming FX566L
Asus TUF Gaming FX566LH
Asus TUF Gaming FX566LI
Asus ROG Strix G512 Series
Asus ROG Strix G512L
Asus ROG Strix G512LI
Asus ROG Strix G512LU
Asus ROG Strix G512LV
Asus ROG Strix G512LW
Asus ROG Strix G513IC Series
Asus ROG Strix G513IE Series
Asus ROG Strix G513IH Series
Asus ROG Strix G513IH-HN Series
Asus ROG Strix G513IM Series
Asus ROG Strix G513QE Series
Asus ROG Strix G513QM Series
Asus ROG Strix G513QR Series
Asus ROG Strix G531 Series
Asus ROG Strix G531G
Asus ROG Strix G531GD
Asus ROG Strix G531GT
Asus ROG Strix G531GU
Asus ROG Strix G531GV
Asus ROG Strix G531GW
Asus Zephyrus G15 GA502 Series
Asus Zephyrus G15 GA502D Series
Asus Zephyrus G15 GA502DU Series
Asus Zephyrus G15 GA502IU Series
Asus Zephyrus G15 GA502IV Series
Asus Zephyrus G15 GA502LU Series
Asus Zephyrus G15 GA503QM Series
Asus Zephyrus G15 GA503QS Series
Asus ROG Strix SCAR II GL504 Series
Asus ROG Strix SCAR II GL504G
Asus ROG Strix SCAR II GL504GM
Asus ROG Strix SCAR II GL504GS
Asus ROG Strix SCAR II GL504GV
Asus ROG Strix SCAR II GL504GW
Asus VivoBook Pro 15 K6502 Series
Asus VivoBook Pro 15 K6502H
Asus VivoBook Pro 15 K6502HE
Asus VivoBook Pro 15 K6502HC
Asus TUF Gaming TUF505 Series
Asus TUF Gaming TUF505DT
Asus TUF Gaming TUF505DV
Asus TUF Gaming TUF505G
Asus TUF Gaming TUF505GT
Asus TUF Gaming TUF506 Series
Asus TUF Gaming TUF506H
Asus TUF Gaming TUF506HC
Asus TUF Gaming TUF506HE
Asus TUF Gaming TUF506I
Asus TUF Gaming TUF506IH
Asus TUF Gaming TUF506II
Asus TUF Gaming TUF506IU
Asus TUF Gaming TUF506IV
Asus TUF Gaming TUF506L
Asus TUF Gaming TUF506LH
Asus TUF Gaming TUF506LI
Asus TUF Gaming TUF506LU
Asus TUF Gaming TUF506Q
Asus TUF Gaming TUF506QM
Asus TUF Gaming TUF565 Series
Asus TUF Gaming TUF565DT
Asus TUF Gaming TUF565DV
Asus TUF Gaming TUF566 Series
Asus TUF Gaming TUF566H
Asus TUF Gaming TUF566HC
Asus TUF Gaming TUF566HE
Asus TUF Gaming TUF566I
Asus TUF Gaming TUF566II
Asus TUF Gaming TUF566IU
Asus TUF Gaming TUF566IV
Asus TUF Gaming TUF566L
Asus TUF Gaming TUF566LH
Asus TUF Gaming TUF566LI
Asus TUF Gaming TUF566LU
Asus TUF Gaming TUF566Q
Asus TUF Gaming TUF566QM
DELL Vostro 3520
DELL Vostro 15 3520
DELL Vostro 5-3520 (P112F)
DELL Vostro 5-3520 (P112F001)
DELL Vostro 5-3520 (P112F002)
DELL Vostro 5-3520 (P112F007)
DELL Vostro 5-3520 (P112F008)
Gigabyte A5 Series
Gigabyte A5 X1
Gigabyte AERO15 Series
Gigabyte AERO 15 SA
Gigabyte AERO 15 WA
Gigabyte AERO 15 YA
Gigabyte AERO 15 KB
Gigabyte AERO15 Series
Gigabyte AERO 15 KB
Gigabyte AERO 15 SA
Gigabyte AERO 15 SB
Gigabyte AERO 15 W8
Gigabyte AERO 15 WA
Gigabyte AERO 15 WB
Gigabyte AERO 15 X8
Gigabyte AERO 15 XB
Gigabyte AERO 15 XC
Gigabyte AERO 15 YA
Gigabyte AERO 15 YB
Gigabyte AERO 15-W9
Gigabyte AERO 15-X9
Gigabyte AERO 15-Y9
Gigabyte AERO 15S Series
Gigabyte AERO 15S KB
Gigabyte AORUS 15G Series
Gigabyte AORUS 15G KB
Gigabyte AORUS 15G KB-7ES1130MD
Gigabyte AORUS 15G WB
Gigabyte AORUS 15G WB-7ES1150MD
Gigabyte AORUS 15G SB
Gigabyte AORUS 15 Series
Gigabyte AORUS 15 W9
Gigabyte AORUS 15-W9-7ES0252W
Gigabyte AORUS 15 X9
Gigabyte AORUS 15-X9-7ES0252W
HP Omen 15-DC Series
HP Omen 15-DCxxx Series
HP Omen 15-DC000 Series
HP Omen 15-DC0000ns
HP Omen 15-DC0001ns
HP Omen 15-DC0002ns
HP Omen 15-DC0003n
HP Omen 15-DC0004ns
HP Omen 15-DC0005ns
HP Omen 15-DC0007ns
HP Omen 15-DC0008ns
HP Omen 15-DC0009ns
HP Omen 15-DC0010ns
HP Omen 15-DC0012ns
HP Omen 15-DC0013ns
HP Omen 15-DC0014ns
HP Omen 15-DC0015ns
HP Omen 15-DC0016ns
HP Omen 15-DC0017ns
HP Omen 15-DC0018ns
HP Omen 15-DC0019ns
HP Omen 15-DC0022ns
HP Omen 15-DC0025ns
HP Omen 15-DC0026ns
HP Omen 15-DC0027ns
HP Omen 15-DC0028ns
HP Omen 15-DC0029ns
HP Omen 15-DC0030ns
HP Omen 15-DC0032ns
HP Omen 15-DC0033ns
HP Omen 15-DC0034ns
HP Omen 15-DC0035ns
HP Omen 15-DC0036ns
HP Omen 15-DC0037ns
HP Omen 15-DC0038ns
HP Omen 15-DC0039ns
HP Omen 15-DC0041ns
HP Omen 15-DC0042ns
HP Omen 15-DC0043ns
HP Omen 15-DC0044ns
HP Omen 15-DC0045ns
HP Omen 15-DC0046ns
HP Omen 15-DC0047ns
HP Omen 15-DC0051ns
HP Omen 15-DC1000 Series
HP Omen 15-DC1000ns
HP Omen 15-DC1001ns
HP Omen 15-DC1002ns
HP Omen 15-DC1003ns
HP Omen 15-DC1004ns
HP Omen 15-DC1005ns
HP Omen 15-DC1006ns
HP Omen 15-DC1007ns
HP Omen 15-DC1008ns
HP Omen 15-DC1009ns
HP Omen 15-DC1010ns
HP Omen 15-DC1011ns
HP Omen 15-DC1012ns
HP Omen 15-DC1013ns
HP Omen 15-DC1014ns
HP Omen 15-DC1015ns
HP Omen 15-DC1018ns
HP Omen 15-DC1019ns
HP Omen 15-DC1021ns
HP Omen 15-DC1027ns
HP Pavilion Gaming 15-DK Series
HP Pavilion Gaming 15-DKxxx Series
HP Pavilion Gaming 15-DK000 Series
HP Pavilion Gaming 15-DK0000ns
HP Pavilion Gaming 15-DK0002ns
HP Pavilion Gaming 15-DK0003ns
HP Pavilion Gaming 15-DK0004ns
HP Pavilion Gaming 15-DK0005ns
HP Pavilion Gaming 15-DK0006ns
HP Pavilion Gaming 15-DK0007ns
HP Pavilion Gaming 15-DK0008ns
HP Pavilion Gaming 15-DK0009ns
HP Pavilion Gaming 15-DK0010ns
HP Pavilion Gaming 15-DK0011ns
HP Pavilion Gaming 15-DK0012ns
HP Pavilion Gaming 15-DK0013ns
HP Pavilion Gaming 15-DK0014ns
HP Pavilion Gaming 15-DK0016ns
HP Pavilion Gaming 15-DK0017ns
HP Pavilion Gaming 15-DK0018ns
HP Pavilion Gaming 15-DK0019ns
HP Pavilion Gaming 15-DK0020ns
HP Pavilion Gaming 15-DK0021ns
HP Pavilion Gaming 15-DK0022ns
HP Pavilion Gaming 15-DK0023ns
HP Pavilion Gaming 15-DK0025ns
HP Pavilion Gaming 15-DK0026ns
HP Pavilion Gaming 15-DK0028ns
HP Pavilion Gaming 15-DK0029ns
HP Pavilion Gaming 15-DK0030ns
HP Pavilion Gaming 15-EC Series
HP Pavilion Gaming 15-ECxxx Series
HP Pavilion Gaming 15-EC000 Series
HP Pavilion Gaming 15-EC0000ns
HP Pavilion Gaming 15-EC0001ns
HP Pavilion Gaming 15-EC0002ns
HP Pavilion Gaming 15-EC0003ns
HP Pavilion Gaming 15-EC0004ns
HP Pavilion Gaming 15-EC0005ns
HP Pavilion Gaming 15-EC0006ns
HP Pavilion Gaming 15-EC0007ns
HP Pavilion Gaming 15-EC0008ns
HP Pavilion Gaming 15-EC0009ns
HP Pavilion Gaming 15-EC0010ns
HP Pavilion Gaming 15-EC1000 Series
HP Pavilion Gaming 15-EC1010ns
HP Pavilion Gaming 15-EC1011ns
HP Pavilion Gaming 15-EC1012ns
HP Pavilion Gaming 15-EC1013ns
HP Pavilion Gaming 15-EC1014ns
HP Pavilion Gaming 15-EC1015ns
HP Pavilion Gaming 15-EC1016ns
HP Pavilion Gaming 15-EC1017ns
HP Pavilion Gaming 15-EC1018ns
HP Pavilion Gaming 15-EC1019ns
HP Pavilion Gaming 15-EC1020ns
HP Pavilion Gaming 15-EC1021ns
HP Pavilion Gaming 15-EC1022ns
HP Pavilion Gaming 15-EC1023ns
HP Pavilion Gaming 15-EC1024ns
HP Pavilion Gaming 15-EC1025ns
HP Pavilion Gaming 15-EC1026ns
HP Pavilion Gaming 15-EC1027ns
HP Pavilion Gaming 15-EC1028ns
HP Omen 15-EK Series
HP Omen 15-EKxxx Series
HP Omen 15-EN Series
HP Omen 15-ENxxx Series
HP 16-WF Series
HP 16-WFxxx Series
Lenovo Creator 5-15IMH05 Series
Lenovo Creator 5 15IMH05 ( 82D4 ) Series
Lenovo IdeaPad Gaming 3-15ARH05 Series
Lenovo IdeaPad Gaming 3 15ARH05 ( 82EY ) Series
Lenovo IdeaPad Gaming 3-15ARH7 Series
Lenovo IdeaPad Gaming 3 15ARH7 ( 82SB ) Series
Lenovo IdeaPad Gaming 3-15ACH6 Series
Lenovo IdeaPad Gaming 3 15ACH6 ( 82K2 ) Series
Lenovo IdeaPad Gaming 3-15IAH7 Series
Lenovo IdeaPad Gaming 3 15IAH7 ( 82S9 ) Series
Lenovo IdeaPad Gaming 3-15IHU6 Series
Lenovo IdeaPad Gaming 3 15IHU6 ( 82K1 ) Series
Lenovo IdeaPad Gaming 3-15IMH05 Series
Lenovo IdeaPad Gaming 3 15IMH05 ( 81Y4 ) Series
Lenovo Legion 5-15ACH6 Series
Lenovo Legion 5 15ACH6 ( 82JW ) Series
Lenovo Legion 5 15ACH6 ( 82QJ ) Series
Lenovo Legion 5-15ACH6A Series
Lenovo Legion 5 15ACH6A ( 82NW ) Series
Lenovo Legion 5-15ACH6H Series
Lenovo Legion 5 15ACH6H ( 82JU ) Series
Lenovo Legion 5-15ARH05 Series
Lenovo Legion 5 15ARH05 ( 82B5 ) Series
Lenovo Legion 5-15ARH05H Series
Lenovo Legion 5 15ARH05H ( 82B1 ) Series
Lenovo Legion 5-15ARH7 Series
Lenovo Legion 5 15ARH7 ( 82RE ) Series
Lenovo Legion 5-15ARH7H Series
Lenovo Legion 5 15ARH7H ( 82RD ) Series
Lenovo Legion 5-15IAH7 Series
Lenovo Legion 5 15IAH7 ( 82RC ) Series
Lenovo Legion 5-15IAH7H Series
Lenovo Legion 5 15IAH7H ( 82RB ) Series
Lenovo Legion 5-15IMH05 Series
Lenovo Legion 5 15IMH05 ( 82AU ) Series
Lenovo Legion 5-15IMH6 Series
Lenovo Legion 5 15IMH6 ( 82NL ) Series
Lenovo Legion 5-15IMH05H Series
Lenovo Legion 5 15IMH05H ( 81Y6 ) Series
Lenovo Legion 5 15IMH05H ( 82CF ) Series
Lenovo Legion 5-15ITH6 Series
Lenovo Legion 5-15ITH6 ( 82JK ) Series
Lenovo Legion 5-15ITH6H Series
Lenovo Legion 5-15ITH6H ( 82JH ) Series
Lenovo Legion 7-15IMH05 Series
Lenovo Legion 7 15IMH05 ( 81YT ) Series
Lenovo Legion 7-15IMHg05 Series
Lenovo Legion 7 15IMHg05 ( 81YU ) Series
Lenovo Legion Y530-15ICH Series
Lenovo Legion Y530-15ICH ( 81FV ) Series
Lenovo Legion Y530-15ICH ( 81LB ) Series
Lenovo Legion Y540-15IRH Series
Lenovo Legion Y540-15IRH ( 81SX ) Series
Lenovo Legion Y540-15IRH ( 81SY ) Series
Lenovo Legion Y540-15IRH-PG0 ( 81SY ) Series
Lenovo Legion Y730-15ICH Series
Lenovo Legion Y730-15ICH ( 81HD ) Series
Lenovo Legion Y740-15ICH Series
Lenovo Legion Y740-15ICH ( 81HE ) Series
Lenovo Legion Y740-15ICHg Series
Lenovo Legion Y740-15IRH Series
Lenovo Legion Y740-15IRHg Series
Lenovo Legion Y740-15IRHg ( 81UH )
Lenovo Legion Y7000P Series
Lenovo Legion Y7000P-1060
MSI ALPHA 15 A3DC Series
MSI ALPHA 15 A3DD Series
MSI ALPHA 15 A3DDK Series
MSI ALPHA 15 A4DEK Series
MSI BRAVO 15 A4DCR Series
MSI BRAVO 15 A4DDR Series
MSI CREATOR 15M A9SD Series
MSI CREATOR 15M A9SE Series
MSI CREATOR 15 A10SD Series
MSI CREATOR 15M A10SD Series
MSI CREATOR 15M A10SE Series
MSI GF63 9SC Thin Series
MSI GF63-9SC Thin Series
MSI GS65 8RE Series
MSI GS65-8RE Series
MSI GS65 8RF Series
MSI GS65-8RF Series
MSI GS65 8SE Series
MSI GS65-8SE Series
MSI GS65 8SF Series
MSI GS65-8SF Series
MSI GS65 8SG Series
MSI GS65-8SG Series
MSI GS65 9SD Stealth Series
MSI GS65-9SD Stealth Series
Lenovo A16
Lenovo FA608WV
Lenovo FA608WI
Lenovo F16
Lenovo FX607VB
Lenovo B160UAN08.1
Lenovo 16.0
Lenovo WUXGA
Lenovo 15ITH6H
Lenovo 82MH
Lenovo 15ITH6
Lenovo 5CB1C17434
Lenovo 5CB1C72439
Lenovo 5CB1C17430
Lenovo 5CB1C17432
Lenovo 5CB1C17433
Lenovo 5CB1C72438
Lenovo GY530
Lenovo 5C10S30064
Lenovo 82D4002NAU
Lenovo AP1JM000200
Lenovo 5B30S18953
Lenovo 5CB0Z21035
Lenovo 5CB0Z21032
NV156FHM-NY4 LCD screen panel – a high‑quality LCD panel designed for laptops, delivering crisp visuals and accurate color reproduction.
Key specifications:
Compatibility: Guaranteed fit for . Double‑check the connector width and pitch before installation.
Installation tip: Handle the screen by the edges, avoid touching the glass, and route the cable carefully through the hinge to prevent pinching.
Warranty & Support: All products come with a 7‑day return policy and free technical support. If you have any compatibility questions, contact our team at info@pcspare.com.
SKU: LT-7817 | Last updated: 2026-09-18 07:24:16
If you are upgrading to a higher resolution, we recommend checking your laptop's service manual or online forums for confirmed compatibility.
How to verify: Check the connector on your original screen – look for printed labels (e.g., "30P 0.4mm") or measure with a ruler. Compare with our product photos.
If you are unsure, send us a clear photo of your original screen's connector – we can match it for you.
We ship all screens in the grade stated on the product page. All screens are tested for functionality – no lines, no flickering, and backlight is working.
If you require a specific grade, please check the product description or contact us before ordering.
Our warranty covers manufacturing defects only – physical damage during installation is not covered.
Accessing the screen requires removing the bezel – some models also require removing the entire display assembly (lid) from the base to avoid damaging cables.
Critical: The cable must be inserted all the way – if it is not fully seated, you will get a partial display or no image. Do not force the cable; if it does not go in easily, check the orientation.
Always disconnect the battery before connecting or disconnecting the LCD cable to avoid short circuits.
Note: This is a delicate operation – proceed with caution. If you are not confident, consider using a professional repair service.
Common pitfalls to avoid:
Watch our installation video or consult your laptop's service manual for model‑specific details.
Critical precautions:
Troubleshooting – what if the screen does not work after installation?
If you have tried all the above and the problem persists: Contact our support with photos of the screen issue and your laptop model – we will help diagnose and arrange a replacement if necessary.